In this video tutorial I dig deep into the ears and explore ear anatomy and structure to show how to draw an ear. Learn how to simplify the complex forms of the ear.
For more video tutorials visit www.proko.com and subscribe to the newsletter
In this tutorial I will go over the parts of the ear and suggest an easy way to remember all these complex shapes. At the end, I will show a step by step of an ear drawing.
Basic Forms
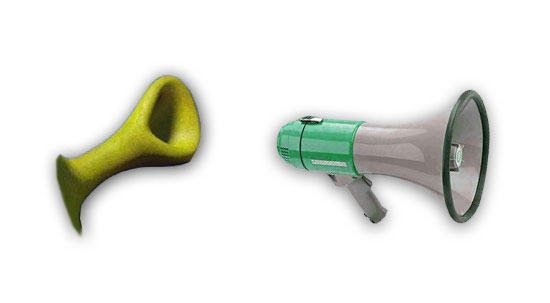
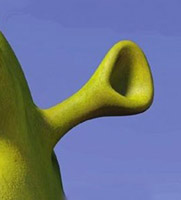
The simplified volume of the ear is very much like a megaphone. This is easier to see from the back, where the concha is like the tubular part and the helix is the lip part of the megaphone. Maybe this explains Shrek’s freakish deformity… I bet the creators of Shrek were thinking of this during the concept designs.
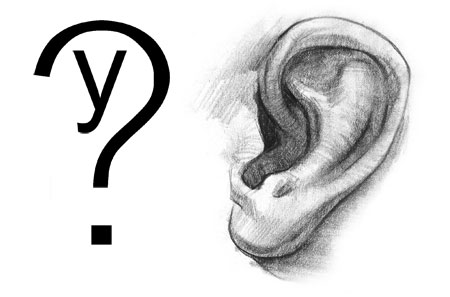
Just Remember “why?”
At first glance the shapes in the ear seem random and confusing. There is though, some structure to this madness. A really easy way to remember these crazy shapes is “why?” or “y?”. The outside of the ear is shaped like a question mark with the dot of the question mark being the earlobe. The squiggly part on the inside resembles the letter “y”.
Placement of the Ears
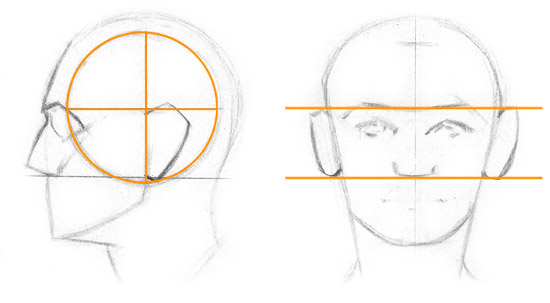
The ears lie in the middle third of the face. The top of the ear aligns with the brow ridge and the bottom aligns with the base of the nose. Horizontally it’s directly behind the jaw. From profile it sits conveniently on the bottom back quadrant of the loomis ball that I mentioned in the previous post.
In Perspective
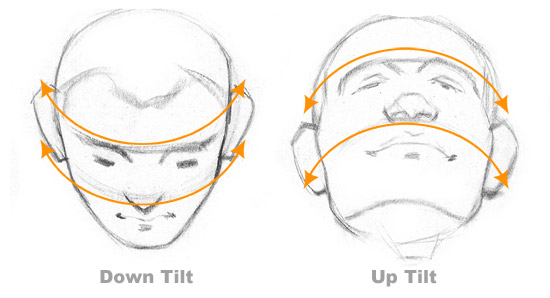
During an up-tilt or down-tilt the placement of the ears is very important since doing it incorrectly can break the illusion of a tilt. On a down-tilt, the ears should be placed higher on the head, while on an up-tilt they should be placed lower on the head.
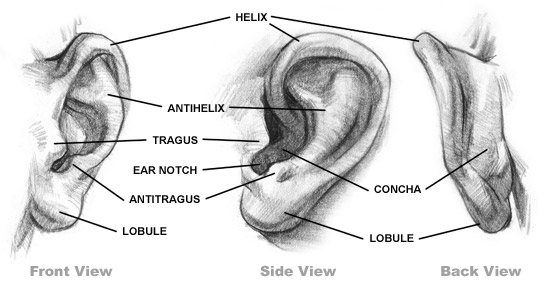
Anatomical Information
Shading the Complex Forms of the Ear
Concha
The concha is the bowl-shaped part that attaches the back of the ear to the head. You can also see it from the front, directly above the antitragus. Shrek has a diseased concha…
Helix
The Helix is a semi-cylindrical form and should be shaded as such. The helix curves over the top of the ear and around into the inside almost completing a circle. This is the hook part of the question mark. When shading a cylindrical volume that forms a loop, think of a donut. Take a look at what the shadow does on a donut.
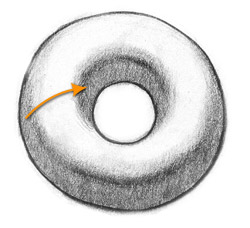
The shadow jumps to the other side where the bottom planes transition to side planes (assuming it’s lit from above). The shadow on the helix does that same thing.
The end of the helix that curves into the inside of the ear will usually be darker then the part on the outside, since it’s on the inside. Imagine the inside of the ear as a dark cave. Obviously this isn’t true of the light source comes from the side and points directly at the ear.
Antihelix
The antihelix is the Y shape inside the ear. At the top, the helix usually casts a shadow onto the two legs of the antihelix. I’ll often use this cast shadow to exaggerate the cylindrical volumes of the antihelix. The upper leg is larger and softer than the lower leg. At the lower end, the antihelix connects to the antitragus at about the same level that the helix connects to the earlobe.
Tragus and Antitragus
The tragus and anti-tragus are like little beads that point at each other. They are separated by a ‘U’ shaped notch in between them.
Lobule
The earlobe is the only part of the ear that isn’t cartilaginous. It’s roughly 1/3 the height of the entire ear, sometimes smaller. The earlobe usually hangs from the ear, but sometimes connects to the jaw.
Drawing the Ear
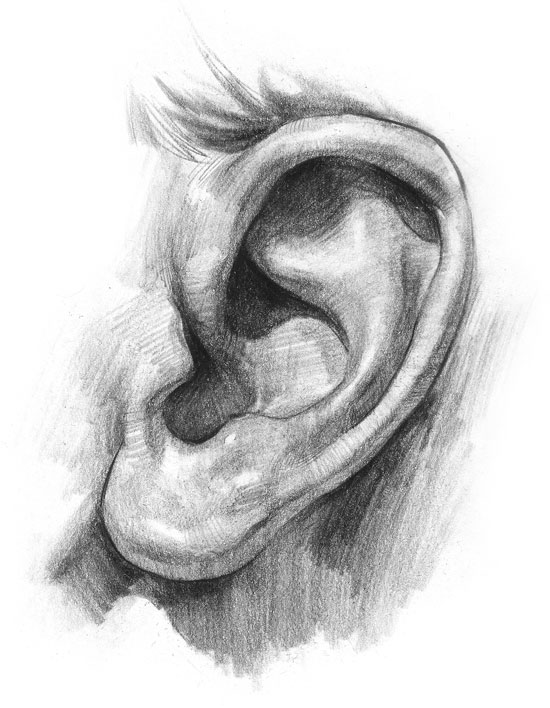
The reference photo…Kidding!
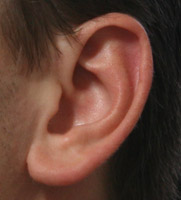
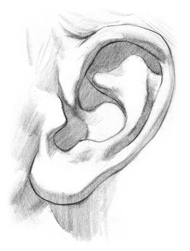
The reference photo.
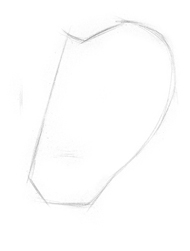
1. Start with the biggest shape of the helix and earlobe. Remember the “?” shape. Get the width to height relationship working so that the ear doesn’t end up too narrow or too wide. Also measure the angle of the ear. It’s usually tilted back slightly towards the top.
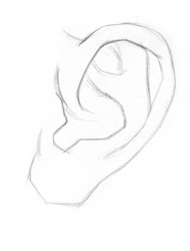
2. Now I’ll focus on the complex shapes inside the ear. Make sure to consistently compare shapes to the shapes around it. Keep checking angles and the size relationships of the shapes. Breaking up the curves into segments of straights makes it easier to design and draw accurately. It’s ok to exaggerate shapes if you think it will make for a better design.
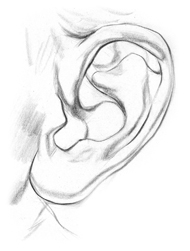
3. Begin mapping the core shadows and cast shadows. Stay true to the simple shapes you’ve established in the previous step, but add a bit of complexity by varying your line width. Also, try not to oversimplify the core shadows. Look for variation in the edges.
4. Separate the lights from the shadows. Stay simple and don’t lose control of your values. Try to ignore all the dark halftones and only fill in the shadows.
5. During the final stage, I’ll add all the halftones, dark accents and reflected light information. Most of the volumes in the ear should be shaded like organic cylinders. Make sure these volumes feel round.