In this video tutorial I show how to draw the structure of the lips and it go over some of its anatomy. We get to see the romantic side of the orbicularis oris and have fun with lipstick!
For more video tutorials visit www.proko.com and subscribe to the newsletter
Basic Forms
One of the most overlooked ideas of the mouth is the cylindrical tooth cylinder underneath. The lips are not flat on the face, but rather get pushed outward by the teeth. The tooth cylinder can be simplified to an inflated tuna can.
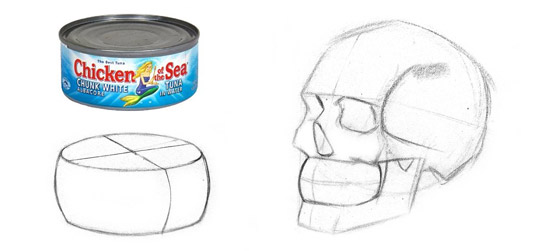
You can see here how this inflated cylinder affects the surface forms of the lips
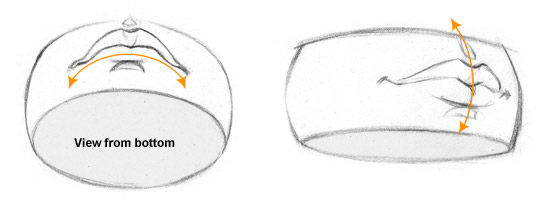
Major Planes
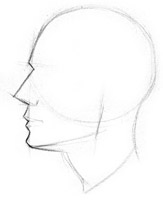
The major planes of the lips are very simple. They are very much like a staircase of 3 steps from the base of the nose to the chin. In fact, if you look at the head from profile, the entire front of the face is like a staircase. The major planes alternate from top plane to bottom plane.
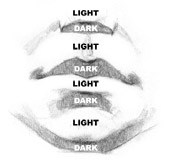
When drawing from a front view, this staircase is indicated by alternating dark and light shapes. Dark, light, dark, light etc..
Anatomical Information
I won’t go into too much detail about all the muscles of the lips and their functions because that’s not the intention of this tutorial. That information is important when studying facial expressions and Human Anatomy for Artists: The Elements of Form is a great resource for anatomy. I will briefly touch on it though, since being familiar with at least the basic mechanics is useful.
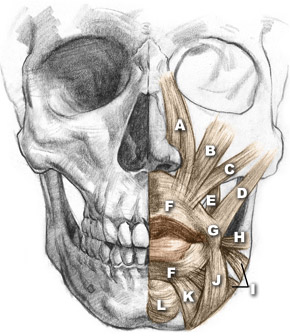
A. Levator Labii Superioris Alaeque Nasi
B. Levator Labii Superioris
C. Zygomaticus Minor
D. Zygomaticus Major
E. Levator Anguli Oris
F. Orbicularis Oris
G. Node
H. Risorius
I. Platysma
J. Depressor Anguli Oris
K. Depressor Labii Inferioris
L. Mentalis
The red portion of the lips and the part directly above and below is called the orbicularis oris. It originates at the corners of the lips called the nodes. These nodes are visible as ‘bumps’ since so many muscles meet and overlap here. All the other muscles of the lips pull at either the orbicularis oris or the nodes to form various expressions.

For example, the Levator Labii Superioris muscles pull the ends of the upper lip upward during a ‘sneer’ to express disgust.The lips attach to the tooth cylinder at the base of the nose and the top of the chin.
Minor Planes
The Red Portion of the Lips
The top lip has three forms and the bottom lip has two. These forms are like ‘pads’ covered by the skin. The rounded form in the middle of the top lip (called the tubercle) wedges between the two forms of the bottom lip. When looking at the lips from an angle, these forms overlap each other adding depth. When drawing a foreshortened object, I always look for overlapping lines to show a form is in front of another. This overlap gives the illusion of depth on a flat piece of paper.
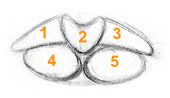

The forms of the lower lip are usually fuller then the upper lip. Sometimes, the red portion of the upper lip is completely hidden and nonexistent.
The Upper Lip Region
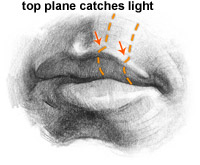
The edge of the upper lip has a small top plane that sometimes catches light. I try to play down this effect and only look for areas to indicate it, rather than drawing a white outline along the entire lip.This upper region of the lips usually has a gradation revealing the rounded ‘tuna-can’ shaped tooth cylinder underneath.
The philtrum is a concave depression in the upper lip. The inside is composed of two planes which soften towards the top and bottom. Try to look for the value difference between the two planes.
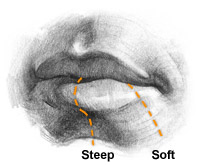
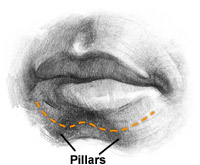
The Lower Lip Region
The ridge that borders the bottom of the red portion is steep towards the center and softer towards the edges. The center of this lower lip region is called the pillar of the mouth, since is has two pillars that angle inward at the top. The pillar is usually in shadow (since light is commonly placed above the head) because it faces downward. This shadow shape softens left and right.
The Node
The nodes in the corners of the lips are very important players. You can see in the anatomical information section above, that many of the muscles attach at the node. These muscles pull on the node to form expressions. Look in the mirror and smile slightly. Then frown. Most of the change occurs in the nodes. Pay close attention to this shape when trying to capture a particular expression.
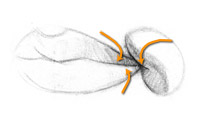
The volume of the nodes is similar to a bean. When shading, make sure to think about the fact that it is round. At the corners of the lips, all the forms are pinched inward.
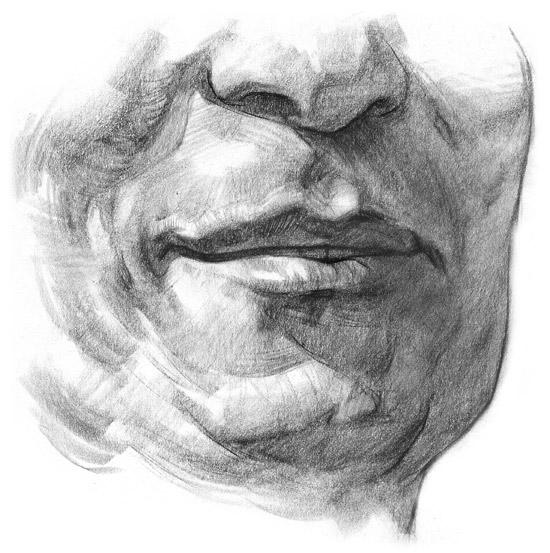
Drawing the Lips
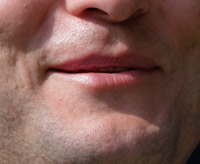
The reference photo
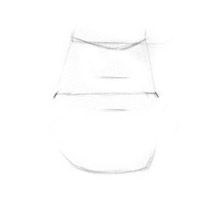
1. I start by finding a few landmarks such as the corners of the lips, top of the top lip, bottom of the bottom lip, and the center division between the lips. Make sure that the angle between the two corners is consistent with the angle of the face. If the face is tilted, the lips must tilt with it. To find the corners, I’ll judge the angles from the nostrils. The bottom of the bottom lip will usually be halfway between the base of the nose and the bottom of the chin.
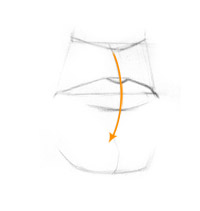
2. The center line – this is a common mistake among students. When the lips are viewed from straight on, the center line will be in the middle. BUT, when the face turns left or right, one side of the lips will be foreshortened. In my drawing, the face is turning towards the right, so the center line will be closer to the right and slightly curved, making the right side of the lips foreshortened. The center line tells me where to place the V shape on the top lip.
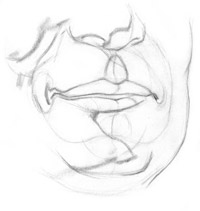
3. At this point, I lay-in all the shapes and indicate plane changes and shadow information. Remember to stay light.
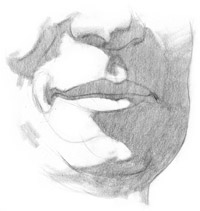
4. When beginning to shade, the first thing I do is separate the lights from the shadows. Stay simple and don’t lose control of your values.
5. I finish off the rendering with subtle halftone shifts in the light areas and reflected lights in the shadows. I look for areas around the lips where i can soften or even lose some edges. A hard outline around the lips makes it look as if they were glued on to the face. Softening edges will connect the lips to the face. I also make sure to keep some hard edges, usually in the corners and center of the lips. The highlight on the bottom lip gives it some shine. The harder the edge around the highlight, the wetter the lips will appear. Lipstick exaggerates this effect.