The Major Planes
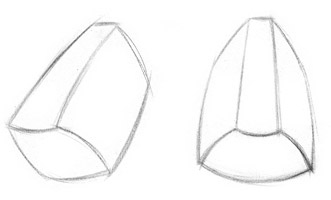
When drawing the nose, I’ll usually start by indicating the 4 major planes – top, 2 sides, and bottom. Getting the angles of these planes correct is important to show the proper perspective of the nose in relationship to the rest of the head. Keeping it this simple in the beginning helps to ignore the details and focus only on the width to height relationship of the entire shape of the nose and to compare it to the rest of the features. Once the big shapes and the perspective are solved, it’s much easier to add the details on top.
Anatomical Information
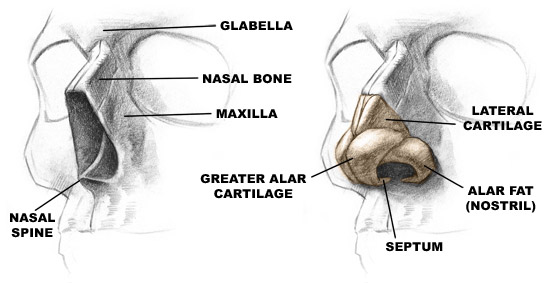
I think the anatomical shapes in the nose are really interesting. It’s made up of interlocking pieces of cartilage and fat attached to the bone of the skull. Half of the bridge of the nose is bone and the other half is cartilage. The lateral cartilage on the bridge wedges between the two pieces that make up the ball of the nose. The nostrils connect to the ball like curled wings.
Bridge
The bridge of the nose is composed of the nasal bone, maxilla, and lateral cartilage. The nasal bone connects to the brow ridge at the glabella. The edge of the nasal bone and lateral cartilage has a thin, sharp ridge as it transitions to the side plane and then connects to the maxilla. The maxilla is usually slightly convex and gently transitions to the cheeks.
Ball
The ball of the nose (Greater Alar Cartilage) is actually made up of two halves with the lateral cartilage wedging between the two. This separation of the two halves is not always visible. The cartilage curves downward and tucks under itself to connect to the skull.
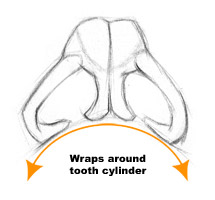
Nostrils
The nostrils (Alar Fat), made of fatty connective tissue are like wings attached to the ball of the nose. Viewed from the bottom, the nostrils connect to the face further back then the septum because of the protrusion of the tooth cylinder.
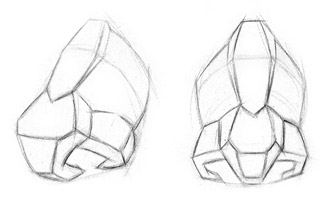
The Minor Planes
It’s important to memorize the subtle plane changes in all the different part of the nose. These subtle plane changes are usually seen as halftone shapes which to the untrained eye appear to be random. Once familiar with the minor planes, you can easily figure out what each halftone shape represents and how to design it in your drawing.
Minor Planes of the Bridge
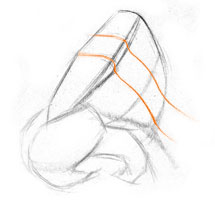
The Glabella is shaped like a keystone. This keystone shape is slanted downward and will usually have some halftone on it connecting the eye sockets together. Immediately after the glabella, the nasal bone turns upward and then back down after the connection to the lateral cartilage. This area of connection between the nasal bone and lateral cartilage tends to be the widest part of the bridge and also creates a subtle ‘bump’ seen from the side.
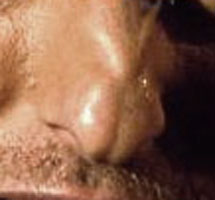
Minor Planes of the Ball
The ball of the nose isn’t perfectly round, but has very distinct plane changes. It has a top, front, and bottom plane as the septum curls under itself and connects to the skull. The side plane acts as a step down to the nostril. The shape of the greater alar cartilage varies drastically from person to person. It can be soft, chiseled, large and bulbous, thin and pointy etc…
Minor planes of the Nostrils
The nostrils, also called wings, curl under themselves similar to the septum. The nostrils are not paper thin, so an indication of the front planes is crucial to give them some thickness. Don’t forget to show the curve by separating the top and side planes, usually with a gradation of tone.
The hole of the nostrils often appears as a sideways comma shape with a sharp edge at the top, and softer edge at the bottom.
Drawing the Nose
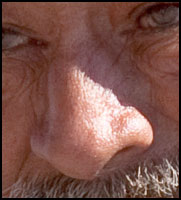
The reference photo.
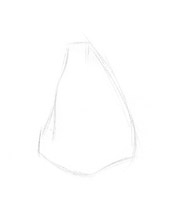
1. I start drawing the nose the same way I start drawing anything: analyze the biggest shape first. Make sure the placement on the face is correct and that the size and shape is working in relation to the other features. What’s the point in drawing any details if the underlying drawing is crooked, too big, and in the wrong place?
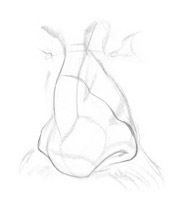
2. When I’m happy with the big shape I’ve established, I will lay-in some of the smaller plane indications and some anatomical information. All my lines at this point are very light, so that I’m able to easily erase them when making adjustments.
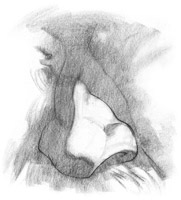
3. When beginning to shade, the first thing I do is separate the lights from the shadows. Stay simple and don’t lose control of your values.
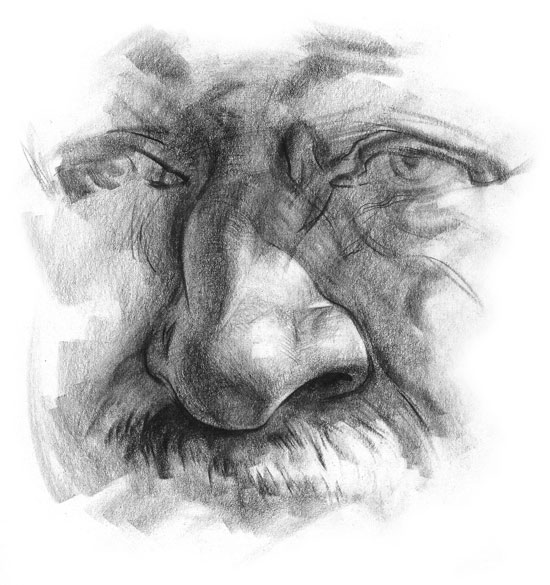
4. At this final stage I’ll use a lot of the information we learned about the minor planes of the nose to shade in subtle halftone shifts in the light areas and reflected lights in the shadows. I try to visualize the interlocking anatomical shapes and make sure all the volumes look accurate: